Archive for the ‘MySQL’ Category

Set innodb_stats_on_metadata=0 which will prevent statistic update when you query information_schema.

mysql> select count(*),sum(data_length) from information_schema.tables;
+----------+------------------+
| count(*) | sum(data_length) |
+----------+------------------+
|     5581 |    3051148872493 |
+----------+------------------+
1 row in set (3 min 21.82 sec)
mysql> show variables like '%metadata'
+--------------------------+-------+
| Variable_name            | Value |
+--------------------------+-------+
| innodb_stats_on_metadata | ON    |
+--------------------------+-------+
mysql> set global innodb_stats_on_metadata=0;
mysql> show variables like '%metadata'
+--------------------------+-------+
| Variable_name            | Value |
+--------------------------+-------+
| innodb_stats_on_metadata | OFF   |
+--------------------------+-------+

mysql> select count(*),sum(data_length) from information_schema.tables;
+----------+------------------+
| count(*) | sum(data_length) |
+----------+------------------+
|     5581 |    3051148872493 |
+----------+------------------+
1 row in set (0.49 sec)
1) start import of data.sql into a dummy db when both instances are running
2) pt-stalk –collect –collect-oprofile –no-stalk for the duration of the import

  • oprofile will show where MySQL spends most of its time during the import

3) run pt-diskstats -g all –devices-regex sdb1 for the duration of the import
4) run poor-man-profiler for the duration of the import

The query to find the total number of databases can be found by executing the following query:

select count(*) from information_schema.SCHEMATA where schema_name not in
('mysql','information_schema');

The new 5.5 is now available with “Semisynchronous Replication”. This comes as an addition to the built-in asynchronous replication. MySQL replication is asynchronous by default. Events written to the binary logs on the Master server being retrieved by the slave server(s). Unfortunately, the Master server has no knowledge of when the slave has retrieved or processed these events. As a result, when Master crashes, transactions committed on Master, might have not have been committed on the slave server(s). In other words, there is no guarantee that any event will ever reach any slave.

In case of “Semisynchronous Replication”, the Master server blockes the transaction commit until at least one of the slave servers acknowledges the it has received all the events for that transaction. Obviously, this is great for consistency, however it brings up questions about replication over the WWW which isn’t an uncommon practice. In case of hitting the timeout limit (in case of no response from any of the slave servers), the Master server reverts back to asynchronous replication.

From MySQL support:

To understand what the “semi” in “semisynchronous replication” means, compare it with asynchronous and fully synchronous replication:

* With asynchronous replication, the master writes events to its binary log and slaves request them when they are ready. There is no guarantee that any event will ever reach any slave.
* With fully synchronous replication, when a master commits a transaction, all slaves also will have committed the transaction before the master returns to the session that performed the transaction. The drawback of this is that there might be a lot of delay to complete a transaction.
* Semisynchronous replication falls between asynchronous and fully synchronous replication. The master waits after commit only until at least one slave has received and logged the events. It does not wait for all slaves to acknowledge receipt, and it requires only receipt, not that the events have been fully executed and committed on the slave side.

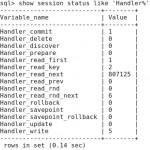
Profiling Queries with SHOW STATUS
mysql> flush status;
mysql> select SQL_NO_CACHE count(*) from table;

– Check query plan now:

mysql> show status like 'Select%';

– Check engine operations:

mysql> show status like 'Handler%';

– Check if there was any ordering:

mysql> show status like 'Sort%';

– Check how many temporary tables have been created:

mysql> show status like 'Created%';

Read on »

./mysqld_safe --user=mysql --basedir=/usr/local/mysql-5.0.67-linux-x86_64-icc-glibc23
--ledir=/usr/local/mysql-5.0.67-linux-x86_64-icc-glibc23/bin --mysqld=mysqld
./mysqladmin ext -u root -p -ri60
./mysqladmin ext -u root -p -ri60 | grep tmp

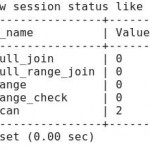
The combination of FLUSH STATUS and SHOW SESSSION STATUS can be used to see what happens while MySQL executes a query. First, run FLUSH STATUS to reset session status variables to zero.

mysql> FLUSH STATUS;

mysql> SELECT COUNT(*) FROM TABLE;

It is possible that mysqld could use up to
key_buffer_size + (read_buffer_size + sort_buffer_size)*max_connections .

There are times when you may have to recover the MySQL root password because it was either forgotten or misplaced. The steps you need are:

1. Stop MySQL
[root@idoumo tmp]# service mysqld stop
Stopping MySQL: [ OK ]

2. Start MySQL in Safe mode with the safe_mysqld command and tell it not to read the grant tables with all the MySQL database passwords.

[root@idoumo tmp]# safe_mysqld –skip-grant-tables &
[root@idoumo tmp]# Starting mysqld daemon with databases from /var/lib/mysql

3. Use the mysqladmin command to reset the root password. In this case, you are setting it to ack33nsaltf1sh.

[root@idoumo tmp]# mysqladmin -u root flush-privileges password “ack33nsaltf1sh”

4. Restart MySQL normally.
[root@idoumo tmp]# service mysqld restart
Stopping MySQL: 040517 09:39:38 mysqld ended [ OK ]
Starting MySQL: [ OK ]
[1]+ Done safe_mysqld –skip-grant-tables

The MySQL root user will now be able to manage MySQL using this new password.